
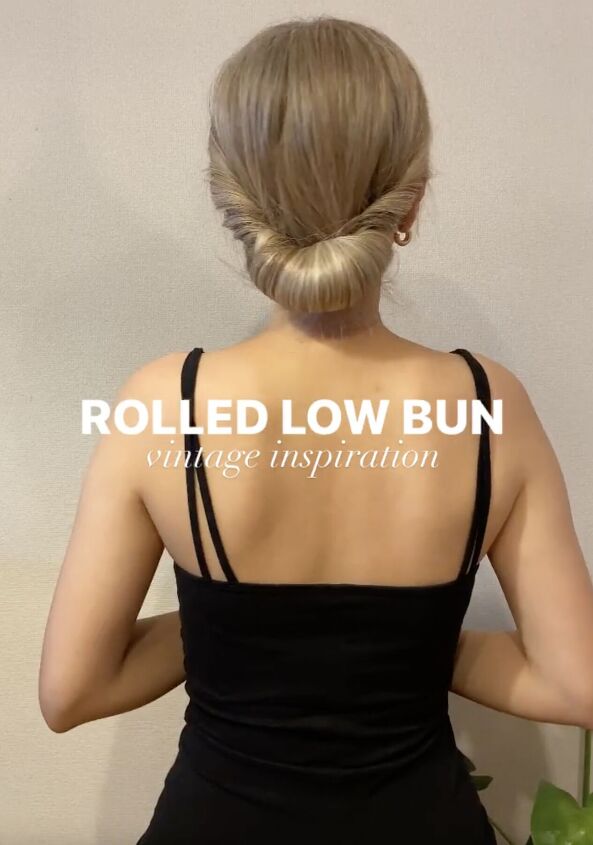
Low Bun Tutorial for Long Hair: A Complete Guide
Are you looking for a chic, versatile, and effortlessly elegant hairstyle? Look no further than the low bun! This classic style is perfect for any occasion, from a casual day out to a formal event. Whether you’re a seasoned hair stylist or a complete beginner, this comprehensive low bun tutorial for long hair will guide you through every step, helping you achieve that perfect, polished look. For more inspiration and tutorials, check out our website hairstylexxx.pages.dev. We offer a wide range of hairstyles suitable for all hair types and lengths.
The low bun is a timeless hairstyle that transcends trends. Its simplicity belies its versatility; it can be dressed up with elegant accessories or kept understated for a more casual vibe. This guide will cover various techniques, from the classic sleek low bun to more textured and bohemian variations. We’ll explore different ways to achieve the perfect low bun, addressing common challenges and offering tips and tricks to ensure a flawless finish every time.
This low bun tutorial for long hair will not only show you how to create a stunning low bun but also equip you with the knowledge to adapt the technique to suit your individual hair type and desired level of formality. We’ll cover everything from prepping your hair to securing the bun and adding finishing touches, leaving you with a hairstyle that’s both beautiful and easy to manage.

1. Preparing Your Hair: The Foundation for a Perfect Low Bun

Before you even begin braiding or twisting, preparing your hair is crucial for a smooth, polished low bun. The condition of your hair directly impacts the final look and the ease of styling. Neglecting this step can lead to a messy, uneven bun that doesn’t hold its shape. Here’s a step-by-step guide to prepping your long hair:
-
Detangle: Thoroughly detangle your hair using a wide-toothed comb or a detangling brush. Start from the ends and work your way up to the roots to prevent breakage. If you have knots, gently work them out to avoid pulling or tugging.
-
Wash and Condition: Washing your hair provides a clean base for styling. Use a high-quality shampoo and conditioner suited to your hair type. For a smoother bun, consider using a smoothing or anti-frizz conditioner.
-
Dry or Air Dry: Whether you choose to blow-dry or air dry your hair depends on your preference and time constraints. If blow-drying, use a low heat setting to minimize damage. Air drying is gentler but may take longer.
-
Apply Product (Optional): For extra hold and smoothness, consider applying a styling product. A smoothing serum or anti-frizz cream can help control flyaways and create a sleek finish. A light-hold hairspray can also be beneficial, especially for fine or slippery hair.
-
Consider Your Hair Type: The preparation process might need slight adjustments depending on your hair type. Thick, coarse hair might benefit from a leave-in conditioner to add moisture and manageability, while fine hair may require less product to avoid weighing it down.
2. Creating the Base: Different Techniques for Different Looks

The way you gather your hair before creating the bun significantly impacts the final aesthetic. A sleek, tight ponytail creates a classic, polished look, while a looser gathering results in a more relaxed and bohemian style. Here are a few techniques:
-
Sleek Ponytail Base: This is ideal for a formal or sophisticated low bun. Use a comb to smooth your hair back into a low ponytail at the nape of your neck. Secure it tightly with an elastic band.
-
Loosely Gathered Base: For a more casual and textured look, gather your hair loosely at the nape of your neck. Don’t worry about perfect smoothness; a few loose strands add to the charm. Secure with an elastic band.
-
Side-Parted Base: For a more playful and romantic look, part your hair to the side before gathering it into a low ponytail or loose gathering. This adds an extra element of style.
-
Braided Base: Before creating the bun, you can incorporate a braid for an added touch of elegance. Braid a section of hair on either side and then combine them with the rest of your hair to create the low bun. This adds visual interest and texture.
Choosing the right base technique depends entirely on the overall look you want to achieve. Experiment with different methods to find your favorite.
3. Forming the Bun: Twisting, Wrapping, and Pinning Techniques

Once you’ve created your base, it’s time to form the bun itself. There are several methods to achieve this, each resulting in a slightly different look and feel.
-
The Classic Twist and Wrap: This is a simple and effective technique. Twist your ponytail tightly, then wrap it around the base of the ponytail, tucking the ends underneath. Secure with bobby pins, ensuring they’re hidden within the bun.
-
The Messy Bun: For a more relaxed and undone look, simply wrap your hair loosely around the base of the ponytail, leaving some strands loose for a more casual vibe. Secure with bobby pins, but don’t worry about perfect placement.
-
The Braided Bun: If you’ve created a braided base, continue braiding the ponytail and then wrap the braid around the base. This creates a more intricate and visually interesting bun.
-
The Sock Bun: For extra volume and a fuller bun, use a hair donut or a rolled-up sock. Place the donut or sock around the base of the ponytail and then wrap your hair around it, tucking the ends underneath. This technique is especially helpful for those with finer hair.
Remember to use bobby pins that match your hair color for a seamless, invisible finish. For extra hold, consider using hairspray after securing the bun.
4. Adding Finishing Touches: Accessories and Hairspray

The finishing touches are what truly elevate your low bun from simple to stunning. Consider these options:
-
Hairspray: A light mist of hairspray will help to keep your low bun in place all day long. Avoid using too much, as this can make your hair look stiff and unnatural.
-
Bobby Pins: Choose bobby pins that match your hair color for a seamless look. Use them strategically to secure any loose strands or to create more intricate bun shapes.
-
Accessories: Elevate your low bun with accessories like decorative hairpins, ribbons, or scarves. These can add a touch of elegance, whimsy, or personality to your hairstyle. Experiment with different accessories to find what suits your style best.
-
Loose Strands: For a more relaxed look, intentionally leave a few loose strands framing your face. This adds softness and a touch of casual chic.
Remember to choose accessories that complement your outfit and the overall occasion.
5. Troubleshooting Common Low Bun Problems
Even with careful preparation, you might encounter some challenges while creating a low bun. Here are some common problems and their solutions:
-
Frizzy Hair: Use an anti-frizz serum or cream before styling to tame flyaways. A light mist of hairspray can also help to control frizz.
-
Loose Bun: Ensure you’re using enough bobby pins and that they’re securely placed. Consider using a hair elastic that’s strong enough to hold your hair in place.
-
Uneven Bun: Take your time and carefully distribute your hair evenly around the base of the bun. Use a comb to smooth out any bumps or irregularities.
-
Hair Too Short: If your hair is too short to create a full bun, try using hair extensions or creating a smaller, tighter bun.
-
Slippery Hair: Use a texturizing spray or dry shampoo to add grip to your hair before styling. This will help the bobby pins hold better.
By addressing these common issues proactively, you can ensure a flawless low bun every time.
Conclusion
Mastering the art of the low bun is a valuable skill for any woman with long hair. This comprehensive low bun tutorial for long hair has provided you with a range of techniques and tips to help you achieve a variety of looks, from sleek and sophisticated to relaxed and bohemian. Remember to practice and experiment to find the methods that work best for your hair type and personal style. For more hairstyle inspiration and tutorials, visit our website: Low Bun Tutorial for Long Hair: A Complete Guide We also have excellent guides on creating perfect braids and styling updos – check them out! With a little patience and practice, you’ll be creating stunning low buns in no time! Remember, the key is to have fun and experiment until you find the perfect low bun for you. Happy styling!


Comments